
5.8.07
Learned From Expert
Outdoor Photography Techniques
Master the skills you need with photography techniques from the experts. Whether you're a novice seeking advice on landscape, wildlife or nature photography or a pro looking for more advanced techniques, you'll find all the information you need, here.
Master the skills you need with photography techniques from the experts. Whether you're a novice seeking advice on landscape, wildlife or nature photography or a pro looking for more advanced techniques, you'll find all the information you need, here.

Cap-Bon-Ami, Forillon National Park, Québec, Canada
Camera, lens and filters were only about one foot above the pebbles during this four-minute exposure of incoming surf at sunrise. Canon EOS-1Ds Mark II, Canon EF 16-35mm ƒ/2.8 lens at 16mm, ƒ/8, four-minute exposure, Singh-Ray Vari-ND at about -5 stops, Singh-Ray Gold-N-Blue color polarizer, two-stop soft-edge grad. Vignetting and a few small water drops that accumulated on the filter during the exposure were later cleaned up in Photoshop.
Extreme Neutral Density
Taking super-long exposures with ND filters can add an artistic component to your photography,
Text And Photography By Daryl Benson
Text And Photography By Daryl Benson
"Fish don't see water, birds don't see air, humans don't see time...but photography does"
When a digital sensor is exposed to light, a subject is recorded in relation to time. For example, a bird in flight photographed at 1⁄4000 of a second looks entirely different than if photographed in the same situation at 1⁄8 of a second. The difference is time. A digital sensor can record the passage of time, be it seconds, minutes or hours.
I've been experimenting with using extreme neutral-density (ND) filters-solid ND, not graduated-to increase daylight exposures from fractions of a second to many minutes long! In the middle of a bright, sunny day, with your lens stopped down to its minimum aperture (say, ƒ/32) and a slow ISO setting (50 ISO), you may get down to a shutter speed of 1⁄15 or 1⁄8 of a second. By putting a polarizing filter on the front of the lens, you can reduce the amount of light entering the camera by another 2 to 2 1⁄2 stops. This will increase the exposure time by an additional 1⁄2 to full second-a slow enough shutter speed to capture a nice, silky veil of water if photographing a waterfall.
As with many techniques, however, there's more to be explored if you can push the boundaries. The idea of extremely long exposures isn't new, but playing with this element during midday poses some interesting possibilities, such as fields of wildflowers blowing in the wind during a five-minute exposure, billowing cumulus clouds streaking through a midday sky in a 15-minute exposure and the tide washing in along a beach during an hour-long afternoon exposure.
Kodak manufactures a series of Wratten ND filter gels ranging in density from ND 0.10 (1⁄2 stop) all the way up to ND 4.00 (-13 1⁄3 stops)! To give you an idea of how much density ND 4.00 is, consider a maximum exposure time of one second under normal daylight. By putting an ND 4.00 over the lens, your exposure would drop to more than two hours! This represents a filter factor of 10,000!
Singh-Ray's glass Vari-ND filter can increase exposure times from two to eight stops by rotating the filter like a polarizer. It's threaded in both directions so other filters can be added. Singh-Ray also makes a single five-stop ND filter that can be threaded to the front of the Vari-ND to increase the filter strength by seven to 13 stops!
Essential Gear...

Lee Neutral-Density Soft Grad Set: This collection of 4x6-inch rectangular grad ND filters uses a soft graduated diffusion to smoothly reduce light from top to
bottom. Stepping down exposure by one stop each, the slides mount to a bracketing system for ideal placement of the diffusion line. Estimated Street Price: $95. Contact: Lee Filters, (800) 576-5055, www.leefiltersusa.com.
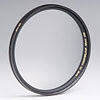
Singh-Ray Vari-ND: Designed to be the only solid neutral-density filter that you may need, the Vari-ND twists to alternate polarity, stepping light loss all the way from two to eight stops, and everything in between. Estimated Street Price: $340 (77mm ring mount); $390 (wide-angle ring mount). Contact: Singh-Ray, (800) 486-5501, www.singh-ray.com.
B+W Graduated ND 501 (0.3-2x) and 502 (0.6-4x): The B+W Grad ND 501 slows light by 50 percent and the 502 steps light loss down to 75 percent. That translates to a one- or two-stop difference, perfect for bright skies that will blow out when exposure is being metered for shadowy foregrounds. Estimated Street Price: $49 to $203, depending on lens diameter. Contact: B+W (Schneider Optics), (631) 761-5000, www.schneideroptics.com.
Practical Considerations
There are several things to consider when trying this extreme exposure technique. If you're using film, reciprocity failure has to be considered. Film becomes less sensitive to light and colors will shift during exposures of a second or more-the longer the exposure, the more pronounced this effect could be (this isn't a problem with digital photography). Whatever your calculated exposure time, add 1 to 11⁄2 stops longer if you're using film.
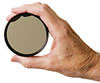
With so much ND in front of the lens, composing (or even seeing through the viewfinder) may become difficult. It's often best to compose the image first, then attach the filters. The ND filter usually goes on first and sits flush to the front of the lens. If using a color polarizer with the ND filter, I'll thread the polarizer onto the lens first, orient it to the color or polarization I want and then thread the ND filter on (being careful not to let the polarizer rotate). If also using a graduated filter, I'll attach it last and, because of possible light leakage, I actually tape it flush to the front of the filter stack by its sides. If the front of the filter is getting any direct sunlight, shade it, even if you have to stand there for a half-hour exposure! If the sun is hitting the front of the filters, even at an oblique angle, it still will accumulate and cause flare with such long exposures.
Vignetting can be a problem, especially when you're using wider-angle lenses. The Singh-Ray Vari-ND and polarizers are available in thin mounts for wide-angle use. This helps, but you'll probably still get some vignetting if you shoot with more than one filter. Photoshop offers techniques to fix vignetting.
Determining exposure can be tricky, although most D-SLRs do a good job of metering through all the filters and density. The most important thing is to block light from coming in through the rear viewfinder while metering, which skews the reading. Some cameras have a built-in viewfinder curtain for this purpose.
If your camera's meter will only calculate exposure times below 15 seconds (for many models, that's the low end cutoff), try opening the aperture until you get a correct exposure reading, then calculate the remaining stops to get the maximum exposure length. For example, if you had to open the aperture to ƒ/5.6 before getting a correct exposure reading for a 15-second exposure, you'll have to count down the remaining stops and exposure times. If, in this example, the minimum aperture your lens had was ƒ/32, that's five stops from ƒ/5.6 (ƒ/8, ƒ/11, ƒ/16, ƒ/22, ƒ/32). Your exposure time would be eight minutes at ƒ/32 (15 sec. at ƒ/5.6; 30 sec. at ƒ/8; one minute at ƒ/11; two minutes at ƒ/16; four minutes at ƒ/22; and finally, eight minutes at ƒ/32). Set the camera to Bulb and use a cable release. All these long exposures will be running your batteries down very quickly. Be aware of that and have plenty of backup if you're attempting this technique a lot through the day.
Digital noise also can be a problem with long exposures. Some cameras have built-in noise-reduction features. Use them, even if it takes longer for the file to be written to the card. Or use noise-reduction software, post-shoot, in your RAW converter or Photoshop.
Compositionally, blurred motion is best appreciated when it's in contrast with something steady and sharp. Whatever your subject in motion is, try to compose it with something that won't be moving during the exposure. Having a solid stone or tree trunk surrounded by blurred movement can create beautiful visual contrast.
See more of Daryl Benson's photography at www.darylbenson.com.
bottom. Stepping down exposure by one stop each, the slides mount to a bracketing system for ideal placement of the diffusion line. Estimated Street Price: $95. Contact: Lee Filters, (800) 576-5055, www.leefiltersusa.com.

Singh-Ray Vari-ND: Designed to be the only solid neutral-density filter that you may need, the Vari-ND twists to alternate polarity, stepping light loss all the way from two to eight stops, and everything in between. Estimated Street Price: $340 (77mm ring mount); $390 (wide-angle ring mount). Contact: Singh-Ray, (800) 486-5501, www.singh-ray.com.

B+W Graduated ND 501 (0.3-2x) and 502 (0.6-4x): The B+W Grad ND 501 slows light by 50 percent and the 502 steps light loss down to 75 percent. That translates to a one- or two-stop difference, perfect for bright skies that will blow out when exposure is being metered for shadowy foregrounds. Estimated Street Price: $49 to $203, depending on lens diameter. Contact: B+W (Schneider Optics), (631) 761-5000, www.schneideroptics.com.
Practical Considerations
There are several things to consider when trying this extreme exposure technique. If you're using film, reciprocity failure has to be considered. Film becomes less sensitive to light and colors will shift during exposures of a second or more-the longer the exposure, the more pronounced this effect could be (this isn't a problem with digital photography). Whatever your calculated exposure time, add 1 to 11⁄2 stops longer if you're using film.
With so much ND in front of the lens, composing (or even seeing through the viewfinder) may become difficult. It's often best to compose the image first, then attach the filters. The ND filter usually goes on first and sits flush to the front of the lens. If using a color polarizer with the ND filter, I'll thread the polarizer onto the lens first, orient it to the color or polarization I want and then thread the ND filter on (being careful not to let the polarizer rotate). If also using a graduated filter, I'll attach it last and, because of possible light leakage, I actually tape it flush to the front of the filter stack by its sides. If the front of the filter is getting any direct sunlight, shade it, even if you have to stand there for a half-hour exposure! If the sun is hitting the front of the filters, even at an oblique angle, it still will accumulate and cause flare with such long exposures.
Vignetting can be a problem, especially when you're using wider-angle lenses. The Singh-Ray Vari-ND and polarizers are available in thin mounts for wide-angle use. This helps, but you'll probably still get some vignetting if you shoot with more than one filter. Photoshop offers techniques to fix vignetting.
Determining exposure can be tricky, although most D-SLRs do a good job of metering through all the filters and density. The most important thing is to block light from coming in through the rear viewfinder while metering, which skews the reading. Some cameras have a built-in viewfinder curtain for this purpose.
If your camera's meter will only calculate exposure times below 15 seconds (for many models, that's the low end cutoff), try opening the aperture until you get a correct exposure reading, then calculate the remaining stops to get the maximum exposure length. For example, if you had to open the aperture to ƒ/5.6 before getting a correct exposure reading for a 15-second exposure, you'll have to count down the remaining stops and exposure times. If, in this example, the minimum aperture your lens had was ƒ/32, that's five stops from ƒ/5.6 (ƒ/8, ƒ/11, ƒ/16, ƒ/22, ƒ/32). Your exposure time would be eight minutes at ƒ/32 (15 sec. at ƒ/5.6; 30 sec. at ƒ/8; one minute at ƒ/11; two minutes at ƒ/16; four minutes at ƒ/22; and finally, eight minutes at ƒ/32). Set the camera to Bulb and use a cable release. All these long exposures will be running your batteries down very quickly. Be aware of that and have plenty of backup if you're attempting this technique a lot through the day.
Digital noise also can be a problem with long exposures. Some cameras have built-in noise-reduction features. Use them, even if it takes longer for the file to be written to the card. Or use noise-reduction software, post-shoot, in your RAW converter or Photoshop.
Compositionally, blurred motion is best appreciated when it's in contrast with something steady and sharp. Whatever your subject in motion is, try to compose it with something that won't be moving during the exposure. Having a solid stone or tree trunk surrounded by blurred movement can create beautiful visual contrast.
See more of Daryl Benson's photography at www.darylbenson.com.
Subscribe to:
Post Comments (Atom)
No comments:
Post a Comment